
Why You’ll Love This Recipe
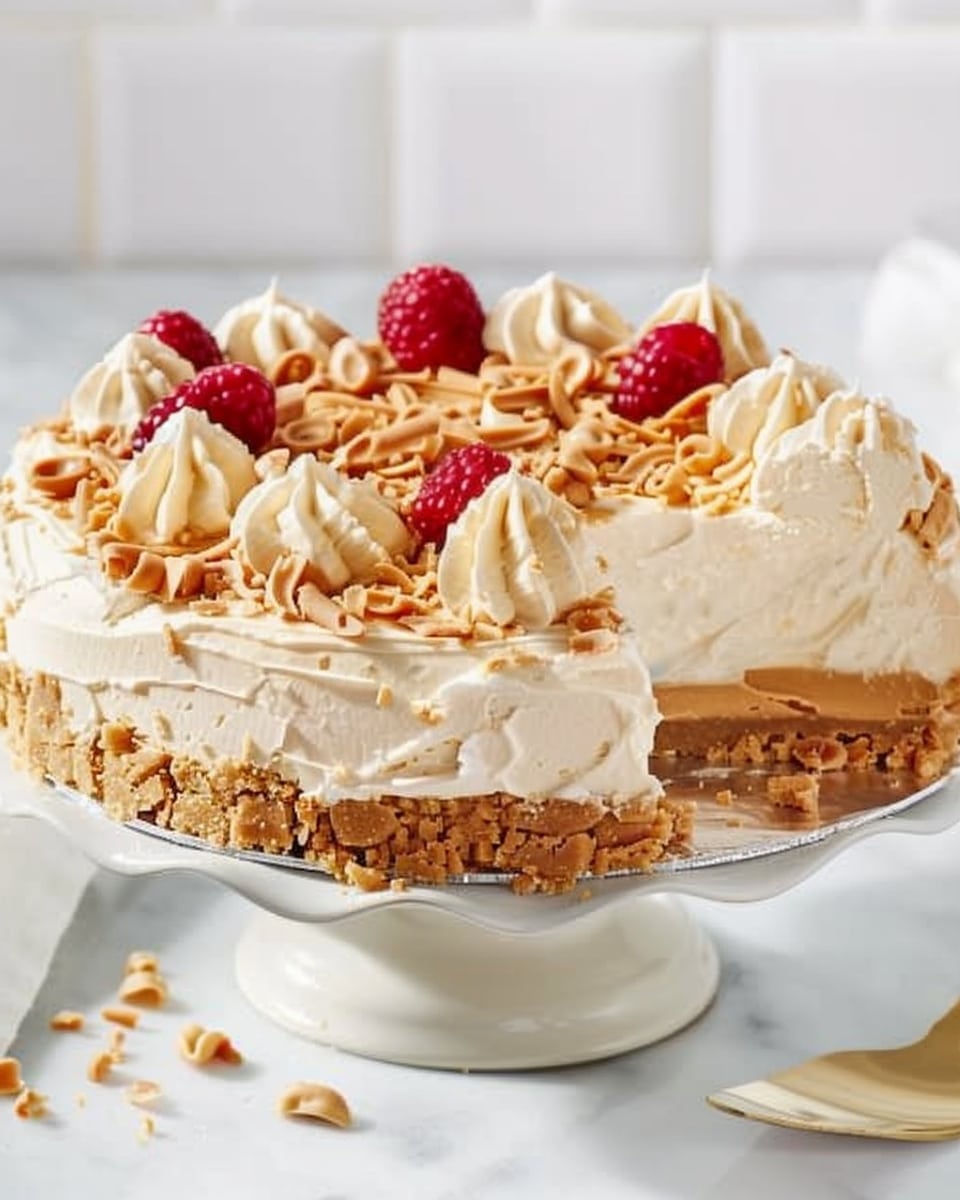
This No-Bake Peanut Butter Pie is the definition of simplicity and decadence combined. The rich, creamy peanut butter filling is perfectly balanced with the sweetness of confectioners' sugar and the richness of cream cheese. Topped with crunchy Reese's Peanut Butter Cups and optional crushed peanuts, it’s a dessert that satisfies both your sweet tooth and your love for peanut butter. Best of all, you don’t need to turn on the oven!
Ingredients
-
8 oz cream cheese
-
1 cup creamy peanut butter
-
¾ cup confectioners sugar
-
1 teaspoon vanilla extract
-
8 oz whipped topping (such as Cool Whip)
-
1 pre-made graham cracker pie crust
-
2–3 Reese’s peanut butter cups, chopped
-
½ cup crushed peanuts (optional topping)
(Tip: You'll find the full list of ingredients and measurements in the recipe card below.)
Directions
-
In a large mixing bowl, use a hand mixer or stand mixer to beat the cream cheese and peanut butter together until smooth and well-combined.
-
Add the confectioners’ sugar and vanilla extract to the mixture, continuing to mix until fully incorporated.
-
Fold in the whipped topping gently until the mixture is creamy and fluffy.
-
Pour the peanut butter mixture into the pre-made graham cracker pie crust, spreading it out evenly.
-
Sprinkle the chopped Reese’s peanut butter cups on top of the pie, pressing them gently into the filling.
-
Optionally, sprinkle crushed peanuts on top for added texture and crunch.
-
Refrigerate the pie for at least 4 hours, or until it has firmed up. For best results, let it chill overnight.
-
Slice and serve cold!
Servings and Timing
-
Servings: This recipe makes about 8 servings, depending on portion size.
-
Timing: Prep time is approximately 15 minutes, and chilling time is 4 hours or more.
Variations
-
Chocolate Crust: Swap the graham cracker crust for a chocolate cookie crust for a more decadent, chocolate-peanut butter combination.
-
Add More Chocolate: Add a layer of chocolate ganache over the peanut butter filling for a rich chocolate-peanut butter experience.
-
Peanut Butter Swirl: For added texture, swirl extra peanut butter into the filling before setting it in the crust.
Storage/Reheating
-
Storage: Store any leftover pie in an airtight container in the refrigerator for up to 4 days.
-
Reheating: This is a no-bake pie, so there’s no need to reheat it. Serve it chilled directly from the fridge for the best texture.
FAQs
Can I use crunchy peanut butter instead of creamy?
Yes, you can use crunchy peanut butter if you prefer a bit more texture in your pie.
Can I make this pie gluten-free?
Yes, simply use a gluten-free graham cracker crust or a gluten-free cookie crust to make this pie gluten-free.
How can I make this pie without whipped topping?
You can substitute whipped topping with heavy cream that’s been whipped to stiff peaks.
Can I freeze this No-Bake Peanut Butter Pie?
Yes, you can freeze the pie. Wrap it tightly in plastic wrap and foil, and store it in the freezer for up to 1-2 months. Let it thaw in the refrigerator for a few hours before serving.
How do I know when the pie is fully set?
The pie is fully set when the filling is firm and holds its shape. It should not be jiggly when you slice into it.
Can I use regular peanut butter cups for the topping?
Yes, regular peanut butter cups will work perfectly for the topping! You can chop them up into smaller pieces or break them into chunks.
Can I make this pie ahead of time?
Yes, this pie can be made a day or two ahead of time and stored in the fridge. The flavors will meld and it will taste even better after chilling.
What other toppings can I add to this pie?
You can top the pie with whipped cream, chocolate shavings, or additional candy like M&Ms or crushed Oreos for a fun twist.
Can I use a different type of crust?
Yes, you can use any pre-made pie crust you prefer, such as a chocolate cookie crust or a shortbread crust, to change things up.
Is this recipe suitable for a peanut allergy?
No, this recipe contains peanut butter and Reese’s peanut butter cups, which are not suitable for individuals with peanut allergies.
Conclusion
This No-Bake Peanut Butter Pie is the perfect dessert for any peanut butter lover. With its creamy filling, crunchy toppings, and minimal prep time, it’s an easy and delicious treat to make for any occasion. Whether you’re hosting a gathering, craving a quick dessert, or just want a peanut butter indulgence, this recipe is sure to hit the spot.
No-Bake Peanut Butter Pie

A creamy and indulgent no-bake peanut butter pie with a graham cracker crust, topped with chopped Reese’s peanut butter cups and crushed peanuts for added texture and flavor.
- Prep Time: 15 minutes
- Cook Time: 0 minutes
- Total Time: 4 hours or more
- Yield: 8 servings
- Category: Dessert
- Method: No-Bake
- Cuisine: American
- Diet: Vegetarian
Ingredients
- 8 oz cream cheese
- 1 cup creamy peanut butter
- ¾ cup confectioners sugar
- 1 tsp vanilla extract
- 8 oz whipped topping (such as Cool Whip)
- 1 pre-made graham cracker pie crust
- 2–3 Reese’s peanut butter cups, chopped
- ½ cup crushed peanuts (optional topping)
Instructions
- In a large mixing bowl, use a hand mixer or stand mixer to beat the cream cheese and peanut butter together until smooth and well-combined.
- Add the confectioners’ sugar and vanilla extract to the mixture, continuing to mix until fully incorporated.
- Fold in the whipped topping gently until the mixture is creamy and fluffy.
- Pour the peanut butter mixture into the pre-made graham cracker pie crust, spreading it out evenly.
- Sprinkle the chopped Reese’s peanut butter cups on top of the pie, pressing them gently into the filling.
- Optionally, sprinkle crushed peanuts on top for added texture and crunch.
- Refrigerate the pie for at least 4 hours, or until it has firmed up. For best results, let it chill overnight.
- Slice and serve cold!
Notes
- This recipe makes about 8 servings, depending on portion size.
- Prep time is approximately 15 minutes, and chilling time is 4 hours or more.
- You can make this pie a day or two ahead of time and store it in the fridge for even better flavor.
- For a gluten-free version, use a gluten-free graham cracker crust or cookie crust.
- Store leftover pie in an airtight container in the refrigerator for up to 4 days.
Nutrition
- Serving Size: 1 slice
- Calories: 350
- Sugar: 22g
- Sodium: 170mg
- Fat: 24g
- Saturated Fat: 6g
- Unsaturated Fat: 14g
- Trans Fat: 0g
- Carbohydrates: 32g
- Fiber: 2g
- Protein: 5g
- Cholesterol: 25mg


Leave a Reply