
Why You’ll Love Homemade Pita Bread
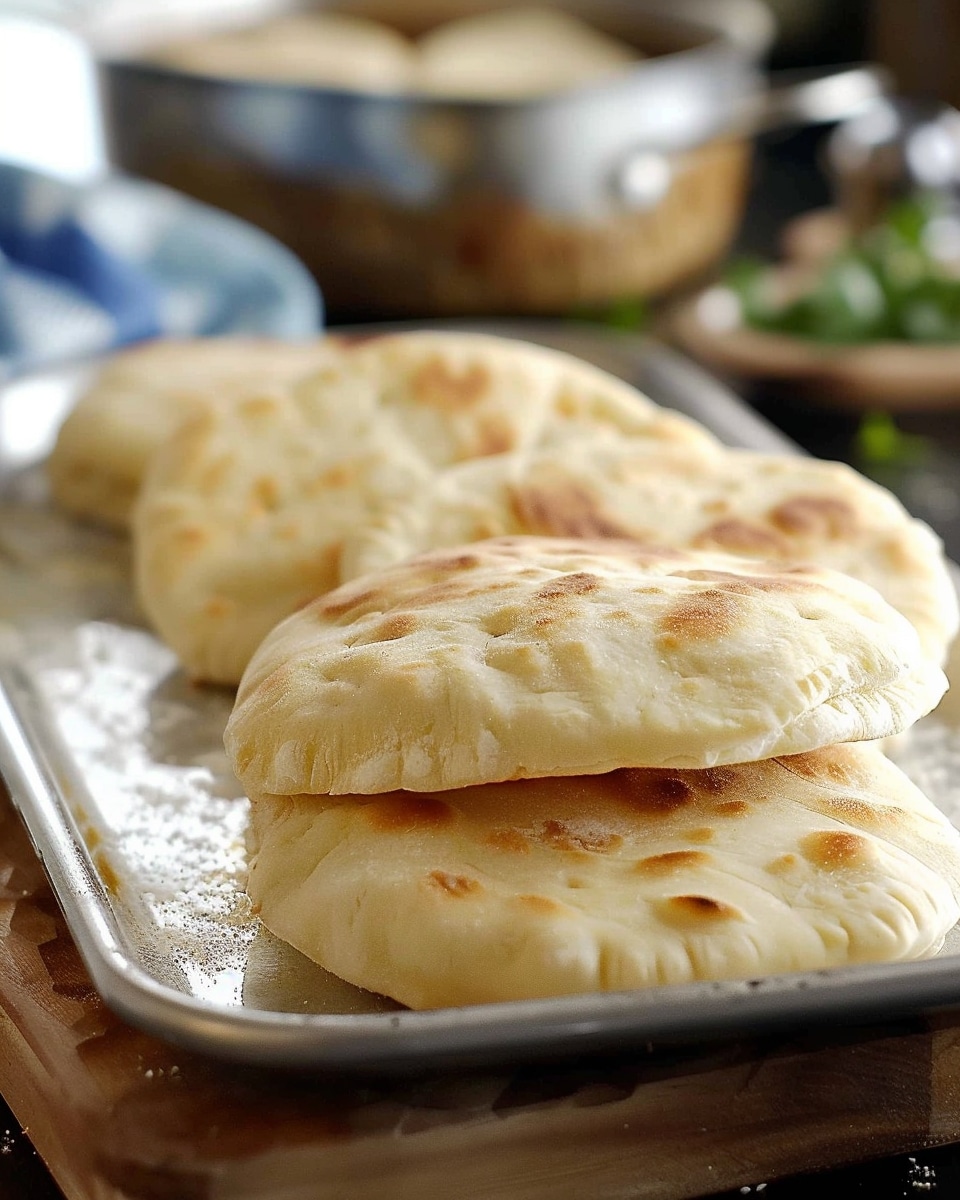
This pita bread is soft, chewy, and full of fresh-baked flavor. The Greek yogurt adds richness and tenderness, helping create a dough that bakes into pillowy rounds with a lovely texture. It is also a versatile recipe that works for wraps, dipping, mini pizzas, or simple snacking.
Another reason to love this recipe is that it is surprisingly approachable. The dough comes together with basic pantry ingredients, and although it takes some rise time, the actual hands-on work is simple. Once you see the pitas puff in the oven, it becomes the kind of recipe you will want to make again and again.
Ingredients
(Tip: You'll find the full list of ingredients and measurements in the recipe card below.)
¾ cup warm water
1 package active dry yeast, 2¼ teaspoons
1 teaspoon plus 1 tablespoon sugar
3¾ cups bread flour, 469 grams, plus more for dusting
1½ teaspoons sea salt
3 tablespoons extra-virgin olive oil, plus more for the bowl
¾ cup whole-milk Greek yogurt
Directions
In a medium bowl, combine the warm water, yeast, and 1 teaspoon of sugar. Let the mixture rest for about 5 minutes, or until it becomes foamy on top. This step helps activate the yeast and ensures the dough will rise properly.
In a large mixing bowl or the bowl of a stand mixer fitted with a paddle attachment, stir together the bread flour, sea salt, and remaining tablespoon of sugar. Add the yeast mixture, olive oil, and Greek yogurt. Mix until the dough begins to come together.
Knead the dough either in the stand mixer on medium speed or by hand on a lightly floured surface for 7 to 10 minutes. Add a little more flour only if needed. The finished dough should feel soft and slightly sticky.
Transfer the dough to a lightly oiled bowl. Cover it with a towel or plastic wrap and let it rise for about 2 hours, or until doubled in size.
Preheat the oven to 500°F and line two baking sheets with parchment paper.
Turn the dough onto a clean work surface and divide it into 12 equal portions. Shape each portion into a ball, cover them, and let them rest for another 20 minutes.
Roll each ball into a circle about ¼ to ½ inch thick. Arrange them on the prepared baking sheets, leaving about an inch of space between each one.
Bake one sheet at a time until the pitas are puffed and lightly golden on top. Start checking them at 5 minutes. They will usually take about 8 minutes total. Rotate the pan after 5 minutes if needed so they puff evenly.
Transfer the baked pitas to a wire rack and let them cool slightly before serving.
Servings and timing
This recipe makes 12 pita breads.
Prep Time: 20 minutes
Cook Time: 5 to 8 minutes per batch
Rising Time: 2 hours 20 minutes
Total Time: About 2 hours 45 minutes to 2 hours 50 minutes
Variations
You can make this pita bread your own in several simple ways. For a heartier flavor, substitute part of the bread flour with whole wheat flour. This creates a slightly denser pita with a more rustic taste.
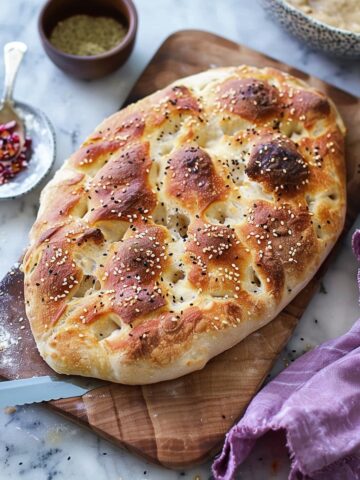
For a savory twist, mix dried herbs such as oregano, thyme, or za’atar into the dough. You can also brush the tops with olive oil and sprinkle them with sesame seeds before baking for extra flavor and texture.
If you want a softer flatbread-style pita, roll the dough a little thicker and avoid overbaking. For crispier pita pockets, roll them slightly thinner and bake just until puffed and lightly colored.
Storage/Reheating
Fresh pita bread can be stored at room temperature in an airtight bag or container for up to 2 days. To keep it soft, make sure it is fully cooled before storing.
For longer storage, freeze the pitas in a freezer-safe bag with parchment paper between layers if needed. They freeze very well and can be stored for up to 2 months.
To reheat, warm them in a toaster, a low oven, or a dry skillet for a minute or two until heated through. If you plan to freeze them, it helps to pull them from the oven just before they brown too much. They will finish browning nicely when reheated.
FAQs
Why didn’t my pita bread puff up?
Pita may not puff properly if the oven is not hot enough, the dough was rolled unevenly, or the dough did not rest long enough. A very hot oven helps create the steam needed for the pocket to form.
Can I make the dough without a stand mixer?
Yes, this dough can easily be mixed and kneaded by hand. It may take a little effort, but the texture turns out just as good.
Can I use all-purpose flour instead of bread flour?
Yes, but the texture may be a little less chewy and structured. Bread flour gives pita a slightly better rise and a more satisfying bite.
How do I know when the yeast is active?
After mixing the yeast with warm water and sugar, it should become foamy within about 5 minutes. If it does not, the yeast may be old or the water may have been too hot or too cool.
Can I make the dough ahead of time?
Yes, you can prepare the dough in advance and refrigerate it after the first rise. Let it come closer to room temperature before dividing and shaping.
Why is Greek yogurt added to the dough?
Greek yogurt adds moisture, tenderness, and a subtle tangy flavor. It helps create a soft and flavorful pita bread.
Can I cook pita bread on the stovetop?
Yes, you can cook pita in a hot skillet, though the puff may be less dramatic than in a very hot oven. It still creates a delicious soft flatbread.
How thick should I roll the dough?
Roll each piece to about ¼ to ½ inch thick. Thinner dough may create a larger pocket, while slightly thicker dough makes a softer bread.
Can I freeze homemade pita bread?
Yes, pita bread freezes very well. Let it cool completely, then store it in a freezer-safe bag and reheat as needed.
What can I serve with pita bread?
Pita bread is great with hummus, tzatziki, baba ganoush, falafel, grilled meats, salads, or used as a sandwich wrap.
Conclusion
Homemade pita bread is a rewarding recipe that delivers soft, warm, and flavorful results with every batch. With its simple ingredients, tender texture, and endless ways to serve it, this is the kind of bread recipe that quickly becomes a favorite. Whether you fill it, dip it, toast it, or enjoy it plain, these fresh pitas are a delicious addition to any meal.
Homemade Pita Bread

5 Stars 4 Stars 3 Stars 2 Stars 1 Star
No reviews
Soft, fluffy homemade pita bread that bakes into beautifully puffed pockets with a tender texture and rich flavor. Perfect for sandwiches, dipping, wraps, or enjoying warm straight from the oven.
- Author: Janet
- Prep Time: 20 minutes
- Cook Time: 8 minutes
- Total Time: 2 hours 45 minutes
- Yield: 12 pita breads
- Category: Bread
- Method: Bake
- Cuisine: Middle Eastern
- Diet: Vegetarian
Ingredients
¾ cup warm water
1 package active dry yeast (2 ¼ teaspoons)
1 teaspoon sugar
1 tablespoon sugar
3 ¾ cups bread flour (469 grams), plus more for dusting
1 ½ teaspoons sea salt
3 tablespoons extra-virgin olive oil, plus more for the bowl
¾ cup whole-milk Greek yogurt
Instructions
- In a medium bowl, combine the warm water, yeast, and 1 teaspoon of sugar. Let rest for about 5 minutes until the mixture becomes foamy.
- In a large mixing bowl or stand mixer bowl, combine the bread flour, sea salt, and remaining tablespoon of sugar.
- Add the yeast mixture, olive oil, and Greek yogurt. Mix until the dough begins to come together.
- Knead the dough in a stand mixer on medium speed or by hand on a lightly floured surface for 7 to 10 minutes until soft and slightly sticky.
- Transfer the dough to a lightly oiled bowl, cover, and let rise for about 2 hours or until doubled in size.
- Preheat the oven to 500°F (260°C) and line two baking sheets with parchment paper.
- Turn the dough onto a clean surface and divide it into 12 equal portions. Shape each into a ball, cover, and let rest for 20 minutes.
- Roll each dough ball into a circle about ¼ to ½ inch thick and place on the prepared baking sheets, leaving space between each piece.
- Bake one sheet at a time until the pitas puff and turn lightly golden, about 5 to 8 minutes. Rotate the pan halfway through if needed.
- Transfer the baked pitas to a wire rack and allow them to cool slightly before serving.
Notes
- Substitute part of the bread flour with whole wheat flour for a heartier flavor.
- Add dried herbs such as oregano, thyme, or za'atar to the dough for extra flavor.
- Brush with olive oil and sprinkle sesame seeds on top before baking for additional texture.
- Store cooled pita bread in an airtight container at room temperature for up to 2 days.
- Freeze for up to 2 months in a freezer-safe bag with parchment between layers.
- Reheat in a toaster, warm oven, or dry skillet until heated through.
Nutrition
- Serving Size: 1 pita
- Calories: 180 kcal
- Sugar: 2 g
- Sodium: 250 mg
- Fat: 4 g
- Saturated Fat: 1 g
- Unsaturated Fat: 2.5 g
- Trans Fat: 0 g
- Carbohydrates: 30 g
- Fiber: 1 g
- Protein: 6 g
- Cholesterol: 5 mg


Leave a Reply